It made me think about riding. More specifically, it made me think about riding in cold weather. Doing so can be less than enjoyable if you're not prepared. So what is the secret to enjoying cool weather rides?
Controlling wind chill!
When it's 40 degrees F and you're riding at 60mph (with no wind), the effective temp is only 25 degrees Fahrenheit (danger of frostbite in 30 minutes!). Check out the chart below showing just how much wind affects the ambient temperature.
Bundle up all you want, but if you can't get the wind off you, it's not a fun ride. Bundling up also makes it hard to operate the controls and isn't really all that effective if the wind is still getting through key spots on your body.
There is so much to say about this topic that we’ve broken it into several parts. In this post we’ll get started – from the top down (that would be your noggin for you southerners)…
Head
In cold weather, there’s no way to get around the most common-sense item: a full-face helmet. You can keep your half-helmet or 'beanie' helmet for warmer weather, but make the investment in a full-face helmet if you expect to ride in cold or wet weather. Our advice: get one with good venting.
For those who argue that their full-face helmet fogs up in the rain or cold, we have a solution for that (and it's less than $20): get yourself an Anti-Fog insert. Problem solved.
Neck
Yep, this deserves its own category. Because when it gets down into the 40’s and you're going 70 mph, you don't want ANY skin showing. A neck warmer or balaclava is just the ticket. It will also keep rain water from sneaking down your neck. Simple but effective!
]]>The Desert Dawgs Rain Guards/Wind Deflectors do a fantastic job of repelling water away from your legs and feet if you happen to get caught in a rainstorm.
But did you know they also reduce updrafts and helmet buffeting? Instead of air hitting your legs and being redirected up toward your face, the Desert Dawgs force the air out and around (rather than up).
The effectiveness of the Desert Dawgs (or any lower deflector for that matter) varies depending on the motorcycle itself as well as on the windshield. For instance, I’ve noticed certain OEM windshields (such as some of the Yamaha ones) result in more wind in my face than the Memphis Shades windshields I’ve had on two different motorcycles.
Factors that can affect wind flow (updrafts):
But let’s be honest: rain makes riding a motorcycle more complex and more dangerous. But there are things you can do to increase your safety and make riding in the rain an enjoyable, rewarding experience.
In this article, I’ll address Comfort.
The truth is, anything that distracts you when you’re riding is potentially dangerous. In rainy weather that could be as 'minor' as a trickle of cold water that leaks down your neck, chilling your whole body.
So it’s important to take some time (and spend some money) to get proper waterproof clothing and gear.
In rainy weather, there’s no way to get around the most common-sense item: a full-face helmet. You can keep your half-helmet or 'beanie' helmet for sunnier times, but make the investment in a full-face helmet if you expect to ride in the rain. Our advice: get one with good venting.
For those who argue that their full-face helmet fogs up in the rain or cold, we have a solution for that (and it's less than $20): get yourself an Anti-Fog insert. Problem solved.
Today’s riding gloves are amazing, and we recommend you have at least two pair with you while riding, a lighter weight pair and a ‘workhorse’ rainproof pair. Still, there are drawbacks to gloves. The biggest one (in my opinion) is that gloves add bulk, which can make it more difficult to grip and definitely more difficult to shift gears.
So, recently I’ve been experimenting with Hand Guards. These are basically a "fairing" for each hand that allows you to adjust the area of protection for each hand.
One of the better ones we've found is the WingShields by Brukus, which are made of a tough polycarbonate which makes them extremely difficult to break, yet light (and clear, which we like). You clamp them to the handlebar or mirror stem and align the curved shield ahead of your hands.
Not only will they protect you from rain, but airflow over your hands will be reduced, making your gripping area warmer.
Get yourself a quality rainsuit, preferably one that incorporates a breathable membrane such as Gore-Tex or similar material. Don’t ‘cheap out’ on this!
Keep your rainsuit with you (I’ve been guilty of violating this one because I like the “naked” bike look); and pack it on top, not at the bottom, of your saddlebag. Or better yet, put it on before you ride.
Use a windshield. Nothing else is more effective at protecting your body, and yet there is much confusion about correct windshield height. Your windshield should be low enough to look over, not just through. Read more about windshield height here.
I’ve found it takes some experimentation to find the right pair of waterproof boots, but they really make a difference if you get caught in the rain.
I hate to say it, but I wear a men’s boot. It’s changing, but for a very long time the only options for women’s boots didn’t have nearly the traction and waterproof qualities of mens (fashion is nice but safety is way better!).
Another great idea is the Desert Dawgs Rain Guards/Wind Deflectors. These soft lowers slip onto your engine guard bar like a glove on a hand and will keep rain off your legs and feet.
Most riders say they experience significant rain protection from the Desert Dawgs; many of our customers swear by 'em (some going so far as to claim they saved their life during a downpour or even snow). Read more and watch the video here.
That said, we’re not fans of the helmet-mounted camera for most motorcycle uses, and here’s why.
Apparently we’re not the only ones who feel this way:
“Mounting a video camera on a motorcycle helmet is difficult. Modern helmets have all sorts of wacky curves, put there for either styling or aerodynamic purposes. The larger the camera the more difficult it is to mount on a helmet.” ~ WebBikeWorld Review
Our Solution? The Swivel-CAM Motorcycle Camera Mount
The Swivel-CAM motorcycle camera mount solves some key problems that Helmet Cameras don't:Can't picture it? Let us SHOW you the difference!
Quick Links: Universal Swivel-CAM Mounts | GoPro Swivel-CAM Mounts
]]>The answer? A little creativity while you ride, plus a little editing time at the computer later.
Here are some tips to make your video into a Story that others will want to watch.
SHOOTING TIPS
See cool stuff
The roads are not the only reason for the trip. Make sure to plan fun and interesting destinations along your route. That could mean a beach, a mountain range, a forest, a city, a monument, a desert, an amusement park, an ocean (or, heck, some relatives or friends!). The list is endless.
Don’t get lost
You’ll enjoy your trip more if you’re not stressed about finding a place to sleep, or wondering how far you can go on a tank of gas.
Get a GPS or a navigation app on your smart phone (See our blog post about GPS vs. Phone) and plug in your route. That way you can simply follow along and not have to worry about getting lost.
Some minor adjustments to your GPS can make you more comfortable (such as turning the screen brightness all the way up). And, of course, you want to make sure your phone or GPS is securely mounted (hint: use a Leader mount!).
Eating...
Look for out-of-the-way “local” places to eat (they often have the best food and atmosphere).
How about taking a tour of America’s weirdest food? Ever tried Scrapple in Pennsylvania? The name is as it implies. Scrapes of the pig! (Could it be good??)
Wisconsin - up in our neck of the words! - is famous for fried cheese curds. (These are amazing!)
Geoduck anyone? The leathery siphon protruding from the six-inch shell of this odd-looking deep-water clam can reach up to three feet in length. Served like sashimi and sauteed in butter. (Not sure about this one...)
And sleeping!
Try to plan your day’s travel so you end up at a location where lodging is available. In peak times of the year lodging can be hard to come by so you may want to make reservations in advance. Knowing where you are going and where you will stop helps make the trip less stressful.
Think about where you want to stay. Do you prefer a big hotel or something smaller? I love a good B&B (bed-and-breakfast); they’re often quaint or quirky, and the food is usually fantastic. Plus they have their fingers on the pulse of what is happening locally and are a great source for things to do in the area.
Every state (and many municipalities) has dedicated tourism websites that can be helpful in identifying destinations and lodging.
I will just say this: do it the safest way you can! By that I mean, mount your phone securely (you don't want to be worrying about it falling off!) in a location (handlebar, brake/clutch, mirror, windshield, etc) that doesn't interfere with driving - and where you can easily glance at it.
To that end, we've tried to make mounting a phone on a motorcycle simple (in fact, it's less complicated than learning how to USE some of these phones!) by designing secure and classy phone mounts.
But how do you know which motorcycle phone mount is best for you? It's a good idea to decide what functions of the phone you are most likely to use when riding (this can help you narrow down your mounting preferences).
Here are seven things to consider:I hope this helps get you started on safe and convenient phone use while riding!
]]>One key to being seen in the rain is visibility. Here are some simple steps you can take to be more visible when you ride in the rain.
Like many bikers, I love black and leather. But when it comes to riding in the rain, I want to be seen at all costs. After all, decreased visibility is one of the main contributors to accidents (rain or not!).
The BEST idea is to get a bright-colored motorcycle. (In fact, some police departments and emergency services are going all-out in that regard)
But the reality is, most of us are NOT like this guy; we don’t want a neon green or bumble-bee yellow bike. I’ve never once chosen my motorcycle (in over 30 years) by the color, but rather by an intuitive desire, and I’d be willing to bet you’ve done the same.
So, the next best thing? Wear bright clothing. Take a tip from the construction industry: they wear yellow or orange to stay visible when working in a high traffic area. So why wouldn’t you do the same?
If you don’t want a neon-colored riding jacket, then wear a reflective vest.
I love my red/white/blue reflective vest, but a yellow or orange vest is even better. They don’t have to LOOK like a construction vest, either - nowadays you can get very stylish vests.
“Fog lights” aka auxiliary driving lights typically come in two varieties: lights that project a somewhat short but wide light pattern (a 30 to 35 degree spread is common) and lights that project a longer and narrower light pattern (20 degrees). Either type added to the front of your bike will make you more visible to traffic.
This article from Webbikeworld does a good job of breaking down which type of light is best for you.
Altering your position in the lane can make you more visible by creating an abnormal driving pattern (and light pattern) that car drivers are more likely to notice. A gradual shifting to the right and left also gives you more opportunity to spot upcoming traffic situations.
Stay away from cars whenever possible, especially their blind spot. Many riders won’t turn their head before making a lane change, especially if they’re also trying to see through a rainy windshield. If you must pass, do it quickly and get into a situation where you’re better seen by all cars on the road.
Use your brake light as a blinker by tapping on the brakes several times in quick succession. This can catch the attention of a driver behind you and/or - heaven forbid - a tailgater (which this guy is apparently expecting)!
Possibly one of the most overlooked improvements in the world of motorcycles relates to tires. Today’s touring tires are marvels at accommodating all the road conditions we’re continually up against. Even so, they can’t give you the same degree of traction and confidence on a wet road as they can on a dry one. And they certainly can’t help you if there’s no traction left on them! Be sure to change your tires out when they start to wear. Tires are like so many things in life: you get what you pay for. It’s just not worth skimping on tires when it could be life or limb on the line.
And, having said that, don’t forget the rest of the puzzle: keep your tires at the correct PSI! Even if it means an extra couple of minutes before you ride off into the proverbial sunset. Underinflated tires are more prone to hydroplaning on wet or rainy surfaces (NOT a good thing)!
This seems obvious, but let’s do some simple math to help drive home my point.
If you’re traveling at 60 mph, your motorcycle will have to start coming to a stop while moving at 88 feet per second. Under perfect conditions, a skilled rider can come to a full stop in around 5.4 seconds; that includes a one-second delay before hitting your brakes.
Tip: Try keeping two fingers on your front brake lever. If you can do that, you’ll save about a second - aka about 88 feet of stopping space!
Now, looking at the numbers, you can see why it’s also a good idea to increase your following distance when riding in the rain. This gives you more time to react to any unfortunate incidences that may unfold ahead of you.
Another advantage of a slower speed is that it reduces your angle in turns (which is where problems are often encountered). Which leads nicely to my next point…
I know sometimes we want to hunch up when we’re getting pummeled with rain. But the more upright you are on the motorcycle, the more weight is applied perpendicular to the road, which increases your traction.
Avoid last-second turns and unnecessary swerves, and when braking, never apply only the front brakes because it can cause your front wheel to slip. (If your rear wheel slips, you can control/recover, but if your front starts skidding, you’re in trouble.)
Tip: Don’t “grab” the brake lever suddenly, but instead, ease the front brakes on to set up the suspension before hard braking. And use the rear brake in combination with the front (something I’m constantly having to work on) at a 60 rear / 40 front ratio if possible. Using the rear brake helps stabilize the chassis, which is a VGT (Very Good Thing).
The worst rains of the season are the first ones. Oily scum has yet to wash off (and, here in Minnesota, the road salt), making the surface particularly treacherous. Rain also has the bad habit of spreading gravel and dirt around; so be on the lookout for this, particularly in rural areas (a BIG issue where we live!).
I think it’s safe to say that most of us would rather NOT hydroplane on a motorcycle (which occurs when a layer of water gets sandwiched between your tire and the road, resulting in zero traction) so avoid standing water or puddles whenever possible.
Slippery surfaces that you might not even notice in a car can be problematic for a motorcyclist. The unstable nature of a two-wheeled bike and the smaller, lighter size mean that sliding on the road can easily result in a crash. Slick surfaces are even more dangerous when the biker is turning. The list of potentially slippery objects/surfaces is long but includes:
And, last but not least: reduce your speed. (Are we noticing a theme here? Slower is better in the rain!)
]]>Consider: Height
The height of your windshield determines the area of protection.
As I learned while working with Memphis Shades, the rule of thumb is that the top of the windshield should come to nose level when you’re sitting upright on the seat (or between upper lip and nose). This creates a ‘slipstream’ effect to push air up and over your head; it also allows you to look over the windshield if you need to (which I do when it’s raining hard!).
That said, I personally find that having a windshield on the tall side gives me a little more protection from wind in particular.
Consider: Quality
Rain can affect visibility (and so can sun glare), so get a high-quality windshield with good optical qualities (ask for DOT-certified clarity) and anti-scratch properties such as windshields made of Lexan polycarbonate. It may cost a little more but like so many things in life, you get what you pay for!
Buying Tips:
Helmet CAM
We’re aware that Helmet CAMs are all the rage. We even own a GoPro ourselves. But we’re not fans of the helmet-mounted camera and here’s why.
Apparently we’re not the only ones who feel this way:
“Mounting a video camera on a motorcycle helmet is difficult. Modern helmets have all sorts of wacky curves, put there for either styling or aerodynamic purposes. The larger the camera the more difficult it is to mount on a helmet.” ~ WebBikeWorld Review
Camera Suction-Cup Mounts
These usually stick to the bike's tank or windscreen. Again I’ll be blunt: we're not fans of using suction cups on motorcycles - period. (And if you worked here, and heard how many customers had their phone, GPS, etc fall off their bike, we think you'd feel the same.)
The potential for the suction to become loose and disengage with all that road vibration is just too great. And there are better ways to get the shot you’re after.
Fixed Camera Mounts
A reviewer on WebBikeWorld noted: “In mounting a video camera on a motorcycle, the mount becomes very important and must have a wide range (degrees of freedom) of movement to compensate for the crazy angle at which the camera will be mounted. But after the camera is lined up, the mount must lock down solid to hold the camera steady.”
We noticed the same things as we experimented with taking video ourselves. In addition to the above, they were also terribly ugly and/or too shaky. In fact, vibration is the #1 problem cited by most riders (especially given the shape of our roads these days).
So we designed our own motorcycle camera mount. Thanks to our patented ‘third generation’ design, the Swivel-CAM motorcycle camera mount solves some key problems:
Does it really work? Check out the video below, taken with our GoPro and the Swivel-CAM motorcycle camera mount!
]]>What and Where
What – specifically - do you want to video? Will it be mostly scenery alongside the road? I’ve pointed my camera to the roadside to catch onlookers during the Patriot Ride and action along Main Street in Sturgis.
Maybe you want to video your buddies either ahead of you (I’ve got some cool footage of a long snake of bikes through a big curve) or behind you.
The answers to these questions lead us to the next set of questions: what angle do you intend to shoot from?
Windshield: Through it or Around It?
There are pros and cons to both. Shooting through a windshield cuts down on wind noise immensely (a video is barely tolerable with that kind of wind noise). If you’re going to edit your video you can drop out wind noise. A disadvantage of shooting through the windshield is that you may get reflection from the sun on the curve of the shield.
If you want to shoot around bikes with fairings or large windshields, you’ll need to look for a longer-reaching mount or one that attaches away from the center of the motorcycle (such as the Swivel-CAM).
Watch for a future post on the different styles of motorcycle camera mounts!
Gloves
Today’s riding gloves are way better than I remember them being twenty years ago (actually I've been riding longer than that but who's counting?). Still, there are drawbacks. The biggest one (in my opinion): Gloves add bulk, which can make it more difficult to grip and definitely more difficult to shift gears.
Heated Grips
In the past I’ve had heated grips on my motorcycle. Let me tell you, that was heavenly. But it’s not a perfect solution:
Hand Guards
Until recently, there were only a few products available that attempted to deal with wind chill on the hands, but they simply didn't work well. We know - we tried them and were disappointed.
With a few extras like these on our bikes, we've been able to extend our riding season - and start earlier in the spring!
]]>Motorcyclists should understand what constitutes a hazard, be alert for such dangers, and take precautions to avoid them. Here are some of the things bikers should be on the lookout for.
Rough roads
We have a lot of these around our home base (which consists of county roads, a popular choice for bikers). Rough and bumpy roads happen due to disrepair, construction work, or resurfacing efforts.
Gravel
Gravel is possibly the trickiest hazard, at least for me (it has factored in two incidents in my riding history!). Unfortunately, gravel on pavement tends to be more common on winding roads, which are, of course, popular with bikers (and which require lots of cornering). Gravel can be particularly troublesome if encountered during cornering -- and especially dangerous for riders going too fast, or riders who haven’t done a lot of cornering yet.
Edge breaks
An edge break is when two traffic lanes are different heights. (These are common here in Minnesota, where we have two seasons: ‘winter’ and ‘road construction’!) Edge breaks are a piece of cake in a car, but can be problematic for unsuspecting bikers, especially at higher speeds - and especially if you’re forced to ‘side step’ over them (try to get as straight-on as you can).
Expansion & Bridge Joints
Expansion joints connect two sections of a road together, or a section of a road to a bridge. Bridge joints hold sections of a bridge together. Both allow the road or bridge to expand or contract without cracking.
We have a bridge over the St. Croix River on a route along the MN/WI border that I love to ride. This bridge always makes me tense because it has everything a biker dislikes: expansion joints and open bridge joints that are really wide (ever get that ‘grid’ feeling when riding across a bridge?!). This particular bridge can be slick even on a sunny day, especially if it’s humid.
Animals
Ah, yes, another one we have to be aware of here in the land of deer, raccoon and even possum! Hitting a small animal can throw a motorcycle off path and/or off balance. Unfortunately, animals that run into the road are difficult to anticipate and swerving to avoid them can cause an accident as well. I once hit a pheasant that ‘flushed up’ behind the bike I was following.
It goes without saying that hitting a large animal (like a deer) could really mess up a rider (or worse). On a trip to Colorado, I was following my dad when he hit a deer. He managed to stay upright but his entire fairing and all his lights were crumpled. (The deer faired even worse.)
Slick surfaces
Slippery surfaces that you might not even notice in a car can be problematic for a motorcyclist. The unstable nature of a two-wheeled bike and the smaller, lighter size mean that sliding on the road can easily result in a crash. Slick surfaces are even more dangerous when the biker is turning. The list of potentially slippery objects/surfaces is long but includes:
Rain/Water
Bikers must also be cautious of rain after a dry spell. Dust, dirt and oil on the road combine with water to form a slippery layer.
The first half hour of a rainstorm is the most dangerous time to ride on the road. Standing water can cause hydroplaning. And though some of you reading this don’t have to deal with snow and ice, here in Minnesota we do! Personally, I try not to ride in it, but if you must, see our blog post for winter riding tips.
Railway tracks and crossings
Motorcycle tires can get caught in a railway track, causing a crash. Some railway crossing areas have metal or wood between the tracks, which become extremely slick when wet.
Debris or objects in the road
Debris or objects in the road, such as parts of tire treads, things fallen from trucks (furniture, tools, boxes), branches, or rocks, are more hazardous to motorcycles than cars. Not only can they cause a crash, but the object itself can hit and seriously harm the rider.
If this all sounds a bit overwhelming, take a deep breath. With a little caution you can retain your joy of riding while staying safe!
Also see: Eight Tips for Defensive Riding
]]>
Whatever your reasons for wanting to ride, we want to help you with a few pointers. If you are a new rider there are some important things you should know before getting in that seat.
Maybe you’re thinking, ‘my husband/brother/boyfriend rides a motorcycle, he can teach me.’ Well, maybe he can, but it may not be a good idea. It’s better to find a teacher who’s not too intimately involved with you. He/she will be more impartial and less nervous about what you are doing.
I can’t say enough about the Motorcycle Safety Foundation Riding Course. I took it years ago, and when I married I insisted my husband take it, too (because *I* didn’t want to teach him!).
An added bonus to the course is that in most states, you can take the license exam at the conclusion of the course. In addition, in some states passing the MSF course qualifies you for discounts on insurance. AND the MSF course can be completed in one weekend.
You may be able to find other riding classes offered for free, but even if there’s a cost, it’s money well spent. Try google to search out classes offered in your area.
I believe so strongly in getting some basic training that you notice I listed this as Step ONE, and then...
Does a motorcycle endorsement on the piece of plastic in your wallet make your riding skills sharper? Of course not.
The real reason licensed riders are less likely to crash is because of their attitude, not their license status. Riders who take motorcycling seriously, ride legally, ride sober, and try to continuously improve their riding skills are more likely to have long and happy riding careers. It's all about attitude.
Everyone has that dream bike. The one they picture in their mind’s eye riding down the road.
However, your dream bike may not be the best choice for your first bike. Why, you ask? I can think of a couple reasons:
One more note: don’t go too big right away (especially women). A big motorcycle can intimidate a new rider and make you uncomfortable, and soon you’ll find yourself less enthusiastic about riding. And we don’t want that!
Get the smaller bike, and just know that at some point, you’ll want to ‘step up’ to a bigger machine. Trust me - you’ll know when the time is right.
It’s not just about the motorcycle; you need the right gear.
A helmet and gloves are a good start (and in my opinion, absolutely required). I have personally found a good set of boots to be crucial - you don’t want to find your feet slipping when you’re trying to stop or move the bike. Also, think about getting a jacket and pants specifically made for riding.
Gearing up right doesn't have to be expensive. You should always buy a helmet NEW, because crash damage to the interior can be undetectable to anyone but an expert. But it’s easy to find gently used riding pants, boots, gloves and jackets. Many retailers and online mail-order houses offer discounts on sell-outs and non-current styles.
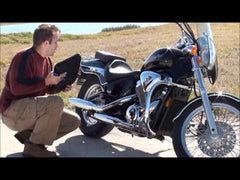
Motorcycling is a social activity. There are tons of groups out there. You can always find people on Internet Message Boards. Just do a search by the brand or type of motorcycle that interests you and see what you find.
Meeting other riders will introduce you to a level of camaraderie that's uncommon these days. Riding with responsible, experienced riders can help you improve your own skills - and it’s the icing on the cake!
]]>
Should you use the navigation app on your phone while riding, or get a GPS unit?
That's up to you, of course. But I still use a GPS when I ride, and here's why:
Having GPS easily accessible on your motorcycle can make you a safer, more relaxed driver. Just be sure to have a high-quality GPS Mount so you'll never lose your phone (My favorite? The SLIDE Mount.)
To see all our GPS mounts, click here.
]]>In that article, I said you want to:
In this article I’m going to focus on (1), or what we often refer to as the “gripper” portion of a motorcycle phone mount.
Just like you may use a holster or case to protect and carry your phone on your body, you need something that "holds" (or "grips") the phone that can be attached to the motorcycle.
This is important, since it can be a "weak point" and cause your phone to fall from your bike. (We've road tested many a product, and most are not made with motorcycle vibration and the condition of today's road surfaces in mind.)
Although many motorcycle phone mounts are labelled "universal," the sheer volume of phones and phone sizes (not to mention cases and covers for them) means that what works for one will not necessarily work for another. Personal style or preference also plays a part. That's why we make mounts with different "grippers," each of which excels at different things:
If a picture is worth a thousand words, a video is worth 10,000!
To help you decide which works best for your phone and case, check out this video, which shows you the pros and cons of different "grippers" and what type/model phone each is most ideal for. All in under three minutes!
All our Swivel-CAMs are made to accommodate the industry-standard ¼-20 tripod stud, which means it will work with the majority of cameras on the market. Note that some of today’s “sport action cameras” require a “tripod adaptor” or “tripod mount adaptor” (see photos for examples of different ones) in order to accomplish this. Often this adaptor is included in the box when you purchase a camera; if not you can find them online.
The Swivel-CAM can be mounted on a handlebar, engine guard bar, brake/clutch, mirror, and more, so it will work on a very wide variety of types of motorcycles. They don’t require much space; the URBAN Swivel-CAM, in particular, features slim brackets that fit in tight spaces.
The multiple pivot points on the Swivel-CAM (which we call Ultra-Swivels) as well as 360-degree rotational ability at the tip and middle (other than the "shortie") means that there are very few angles you can’t get with the Swivel-CAM.
Second, the Swivel-CAM is available in three different heights, so no matter what you’re riding or where you mount the camera, you can shoot over or around windshields or other parts of the motorcycle.
Note: We generally advise customers to choose the absolute minimum height camera mount that will work for their application. Why? Because, while our mounts incorporate anti-vibration features, there’s a law of physics (“the longer the rod, the more vibration at the tip”) that we simply can’t change.
We’ve done everything we can to minimize vibration, such as the anti-vibration ‘cushion’ found on each and every Swivel-CAM. Stainless steel and aluminum components also help minimize vibration and won’t rust or wear out (rubber or plastic is much more susceptible to vibration and wear).
But a video is worth 10,000 words, so here’s one we shot with the Swivel-CAM:
]]>Riders who’ve made the move to the new 2018+ Harley-Davidson Softail Models can now get the protection and comfort of the Desert Dawgs Rain Guards/Wind Deflectors!
Keep the rain off your feet and reduce those annoying updrafts and helmet buffeting. And there’s more:
Unlike competitive products, the Desert Dawgs are easy-on, easy-off. They require NO special tools or maintenance, and can be rolled/folded and stored in a saddlebag when not in use. Choose from Original or Bling It Out with chrome studs!
Desert Dawgs are now shipping for both the Standard and the Mustache engine guard bars.
They will fit the following models: Fat Bob, Fat Boy, Heritage Classic, Low Rider, Deluxe, Breakout, Softail Slim, Street Bob & Sport Glide.
]]>
Picking a Route
The beauty of traveling on a motorcycle is that no one just “takes the freeway.” For some the point/goal is to pick roads they’ve never ridden on. Others look for scenic drives, roads with lots of curves (hooah!) or quaint towns they can explore along the way.
Google the words “scenic routes” and all kinds of things come up. Or, get out your “old-fashioned” map and peruse your route to see what towns and sights are near it.
If you’ve always wanted to see a landmark (say, Mount Rushmore or Niagara Falls) or tourist attraction (Disneyland?!), plan your route to take you through it (or by it).
Experience Cool Stuff
The roads are not the only reason for the trip. Make sure to plan fun and interesting destinations along your route.
Look for out-of-the-way “local” places to eat (they often have the best food and atmosphere).
Think about where you want to stay. Do you prefer a big hotel chain or something smaller? I love a good B&B (see http://www.bnbfinder.com/ or https://www.bedandbreakfast.com/); they’re often quaint or quirky, and the food is usually fantastic. Plus they have their fingers on the pulse of what is happening locally and are a great source for things to do in the area.
Every state (and many municipalities) has dedicated tourism websites that can be helpful in identifying destinations and lodging.
Try to plan your day’s travel so you end up at a location where lodging is available. (In peak times of the year you may want to make reservations in advance.)
TIP: Don’t get lostYou’ll enjoy your trip more if you’re not stressed about finding a place to sleep, or wondering how far you can go on a tank of gas. Get a GPS or a navigation app on your smart phone (See our blog post about GPS vs. Phone) and plug in your route. That way you can simply follow along and not have to worry about getting lost. Of course, you want to make sure your phone or GPS is securely mounted (hint: use a Leader mount!).
The Little Things: Comfort & Convenience
Packing: Packing is super important on a bike because you have such limited space. You don't want to look like this guy! Think about the weather where you’re traveling and realize the temperature may swing from high to low in the span of a day. Layer clothing whenever possible, and make sure you have the essentials. Another must: rain gear and good-quality leather chaps.
Helmet Laws: Know the helmet laws in the states in which you’re traveling. Don’t get caught without one in a helmet-law state! (No fun to get a ticket on your dream trip.) Check out this site for a map of the states where helmets are required.
Don’t Try to do Too Much
If you’re not used to riding long distances, don’t force yourself to stay in the saddle for hundreds of miles. Plan stops along the way: for hydration, a bathroom break, or just to walk around and get the blood flowing (and give your rear a break). Plan the total number of hours or miles to be comfortable for you and you’ll have a much more enjoyable trip.
Invest in a set of Desert Dawgs for rain and wind protection; a butt cushion (or custom seat if your budget allows); or some music… anything for comfort and convenience.
One last thing to think about
Have you taken your bike for a “wellness” check? You and your motorcycle are going to spend a lot of time together on this trip, so make sure your bike is “healthy”! Make sure someone knows where you’re going and all your contact information and insurance information is up-to-date and stored in a safe place.
You are prepared, packed, organized, and it’s time to hit the road. You can do it knowing you are going to make memories that will last a lifetime! Enjoy!
TIP: Saving Memories]]>Now that you’re finally taking your dream trip, there’s nothing cooler than recording it in both picture and video. The scenery and shots can be amazing!
Today’s action cams are light and powerful. Naturally, we have what you need to mount the camera: the Swivel-CAM is perfect for shooting video.
Think of all the fun you’ll have going back to watch this video in the dead of winter!
On my 10yo daughter's first ride with me, she felt like she was going to fall off the back. I felt that way too, after having a passenger backrest for 10+ years (not to mention the safety harness we had when the kiddos were younger).
So, first order a business was to secure a passenger backrest. That set me back $500, although I’m very happy with the seat (special thanks to Jim @ www.smoothspyder.com, another family-owned business manufacturing in the USA).
Discovery #2: Excessive heat by legs
Almost immediately I started noticing how hot it got by my legs. And lo and behold, without me even mentioning it to our Spyder customers, Bernard S offered up some SpyderPops parts he’d bought for his wife’s Spyder and never used (she traded up before he got it installed) – all for the price of postage. It was a deal I couldn’t pass up (thanks Bernard!). I confess I haven't installed them yet (in Minnesota, you WANT extra heat when you ride in October!) but I think the heat will be borderline intolerable in the heat of the summer, so they will get used!
Discovery #3: Ancient battery
A couple weeks later, we lost out on a couple rides because the battery wouldn’t hold a charge. I’d hoped to limp it through the fall, but when I found out the battery was nine years old (in 30 years I’ve never had one last more than 7!) I knew it was time to let that one go. $150 later, I had a new battery.
By mid-October, I was enjoying the heck out of the Spyder. My right hand had finally stopped reaching for the front brake automatically, and I’d gotten used to that “jiggly feeling” I wrote about back in September.
But I can’t say I was truly “one with the machine” yet. My biggest challenge was cornering, especially to the left. I’ve been leaning on two-wheel motorcycles for thirty years, and I have to admit… I miss leaning! My cornering was still herky-jerky.
I figured I had another few weeks to work the kinks out of my cornering methods before the Red Beast would have to go under wraps… and then disaster struck!
Discovery #4: Gear Shift Issues
We were having an unseasonably warm Indian Summer the week of Oct 16, and my daughter was off school. She and I tooled around town on the Spyder that Monday (that's us!) and even splashed around in the Rum River. I dropped her at home (with her brother) and headed to her parent/teacher conferences.
I never made it. The Spyder got stuck in first gear. (Did you know it takes 45 minutes to go 12 miles in first gear?!)
The repair shop picked it up the next day, but they were confounded. They consulted with BRP technicians. Meanwhile, the BEST week of the season raced by (Friday’s high that week was 80).
To make a long story short, it was a swing arm that had not been installed properly, either by a previous technician or maybe even never. It had hung on but over time finally vibrated off. By the time I was able to pick the Spyder up, a week had gone by and it was now 50 degrees with 35mph winds.
As a further indignity, we got SNOW two days later!!
Sad to say, I haven’t had the Spyder out since I brought it home, since temps haven’t gotten out of the 30s (in fact it's snowing lightly again now).
One thing I need for spring is a bigger windshield. After a couple decades on cruisers with a windshield, having the full blast of the wind in my face in Minnesota fall season has not been very enjoyable.
I hope you are still out riding your Spyder, and I hope we get at least one more day of 50+ degrees so I can get one more ride in!
]]>
The salesperson emphasized that riding the Spyder is NOT like riding a motorcycle (which, thanks to our customers, I already knew).
But I still thought: how different can it be? After all, just like any other motorcycle, there are quite a few ways you can be injured or killed than if you’re in a car LOL!
But… It isn’t like riding a motorcycle. At all.
With over 30 years riding on two wheels, I immediately felt what I can only describe as a “lack of oneness” with the Spyder.
A motorcycle moves with you, and you with it; you lean into turns, your hands and feet are both in play when you brake, and you feel the engine beneath you. In short: The bike is a part of you.
Not so with the Spyder. At least not for me, in that short test ride. The sensation I had in turns was that of being pulled (and holding on for dear life). The ‘jiggly’ feeling was reminiscent of my last snowmobile trip in Yellowstone! Another test rider referred to driving the Can-Am Spyder as “operating” it rather than “riding” it. Maybe he’s onto something.
Whether it’s the wisdom of age or my motorcycle crash a couple years ago, I really like the idea of three wheels (and with a brain overcome with other things, maybe the mental part of riding won’t seem so tiring). Perhaps if I could rent a Spyder for a day I’d come to feel more like I’m working with the machine rather than against it.
What do you think? Drop me a note at zoom@leadermotorcycle.com with your thoughts!