News
Shooting Video While Riding a Motorcycle
Many riders have discovered the possibility of re-living their grand "adventure vacations" through video. The problem is, after a minute or two, an unchanging view from the saddle becomes… well… boring. If you want to make your video as exciting as your motorcycle ride, here are some things to consider. Your answers to these questions can also help you decide what equipment to get.
What and Where
What – specifically - do you want to video? Will it be mostly scenery alongside the road? I’ve pointed my camera to the roadside to catch onlookers during the Patriot Ride and action along Main Street in Sturgis.
Maybe you want to video your buddies either ahead of you (I’ve got some cool footage of a long snake of bikes through a big curve) or behind you.
The answers to these questions lead us to the next set of questions: what angle do you intend to shoot from?
- Mainly straight ahead?
- Off to the side or beside you?
- Behind you?
Windshield: Through it or Around It?
 There are pros and cons to both. Shooting through a windshield cuts down on wind noise immensely (a video is barely tolerable with that kind of wind noise). If you’re going to edit your video you can drop out wind noise. A disadvantage of shooting through the windshield is that you may get reflection from the sun on the curve of the shield.
If you want to shoot around bikes with fairings or large windshields, you’ll need to look for a longer-reaching mount or one that attaches away from the center of the motorcycle (such as the Swivel-CAM).
Watch for a future post on the different styles of motorcycle camera mounts!
- Tracey Cramer
Four Tips for Choosing a Video Camera for your Motorcycle
 In other posts, we've talked about things to consider before you shoot video, and compared different styles of camera mounts.
Now let's talk about the camera. We’re not going to try to recommend a camera; we’re simply not experts in this field and they change too quickly anyway. But here’s what we’ve learned in 6+ years of shooting video while riding a motorcycle.
- Quality matters. Cheaper cameras will be susceptible to every vibration, and - let's face it - you can't eliminate vibration entirely when you're on a motorcycle (even if you're using the best Motorcycle Camera Mount on the planet). So get a quality camera. Depending on how you're mounting it, the size and weight of the camera matter as well; generally, the smaller/lighter, the better.
- Learn how to use your camera. Make sure you know when it is and is not recording. (On some cameras it's hard to tell, especially if it's a HelmetCam stuck to your head where you can't see it. I once lost a key sequence because I thought the low-battery light meant the camera was recording.)
- Practice. Pick a time when traffic is light on your favorite short twisty road. If you can get a friend to help, all the better - you'll find you can use the extra help. Don't be surprised if it takes an entire afternoon to get comfortable with all your motorcycle video taking options.
-
 Speaking of the ROAD ... The quality of your video (or photos) is directly proportional to the quality of the road. If you're on a road that looks like this one (like most of the roads near our home!), getting good video is a challenge no matter what kind of camera or mount you choose (but starting with the Swivel-CAM Motorcycle Camera Mount is a good bet)!

- Tracey Cramer
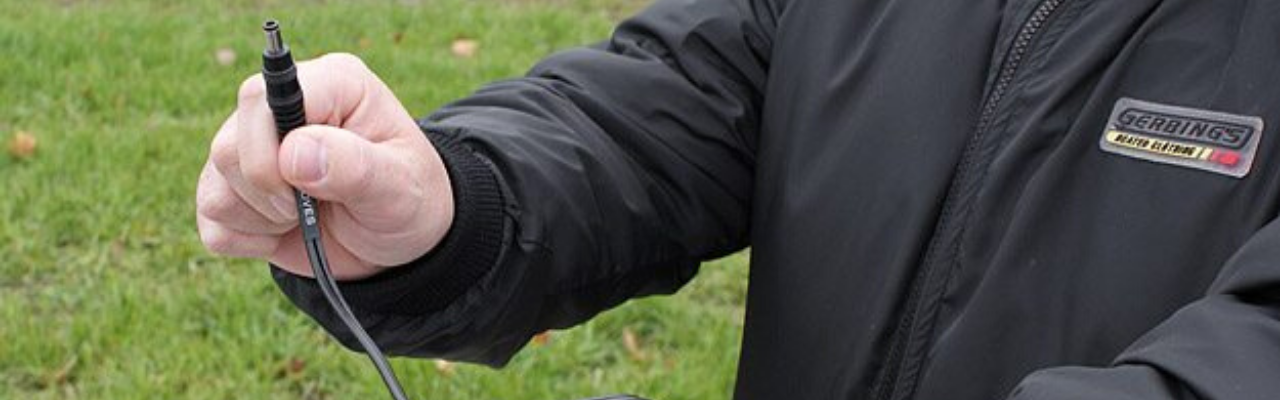
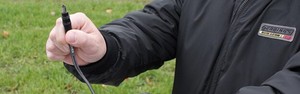
How to Keep your Hands & Fingers Warmer
They’re hangin’ out there with no protection from the windshield or fairing. Yep: your hands (and by extension, your fingers). So what’s a rider to do?
Gloves
Today’s riding gloves are way better than I remember them being twenty years ago (actually I've been riding longer than that but who's counting?). Still, there are drawbacks. The biggest one (in my opinion): Gloves add bulk, which can make it more difficult to grip and definitely more difficult to shift gears.
Heated Grips
 In the past I’ve had heated grips on my motorcycle. Let me tell you, that was heavenly. But it’s not a perfect solution:
- Wiring them through the handlebar was a P-A-I-N.
- They don't protect from rain.
- I can’t prove this, but I’m convinced they drain the battery faster
Hand Guards
Until recently, there were only a few products available that attempted to deal with wind chill on the hands, but they simply didn't work well. We know - we tried them and were disappointed.
 What you need is basically a "fairing" for each hand that allows you to adjust the area of protection for each hand. The ATV and dirt bike market figured this out long ago and I can’t figure out why the cruiser market hasn’t embraced this concept!
 One of the better ones we've found is the WingShields by Brukus, which are made of a tough polycarbonate that makes them extremely difficult to break, yet light (and clear, which we like). You clamp them to the handlebar or mirror stem and align the curved shield ahead of your hands.
With a few extras like these on our bikes, we've been able to extend our riding season - and start earlier in the spring!
- Tracey Cramer

New Year's Resolution: Learn to Ride! How to do it Right!
Have you been thinking about getting a motorcycle and/or learning to ride? Does the idea of riding free on two wheels make you smile? Have you seen bikers go by and wondered what you were missing? Or maybe you just want to save a little gas on your commute?
Whatever your reasons for wanting to ride, we want to help you with a few pointers. If you are a new rider there are some important things you should know before getting in that seat.
Step One: Take a class.
Maybe you’re thinking, ‘my husband/brother/boyfriend rides a motorcycle, he can teach me.’ Well, maybe he can, but it may not be a good idea. It’s better to find a teacher who’s not too intimately involved with you. He/she will be more impartial and less nervous about what you are doing.
I can’t say enough about the Motorcycle Safety Foundation Riding Course. I took it years ago, and when I married I insisted my husband take it, too (because *I* didn’t want to teach him!).
An added bonus to the course is that in most states, you can take the license exam at the conclusion of the course. In addition, in some states passing the MSF course qualifies you for discounts on insurance. AND the MSF course can be completed in one weekend.
You may be able to find other riding classes offered for free, but even if there’s a cost, it’s money well spent. Try google to search out classes offered in your area.
I believe so strongly in getting some basic training that you notice I listed this as Step ONE, and then...
Step Two: Get licensed.
Does a motorcycle endorsement on the piece of plastic in your wallet make your riding skills sharper? Of course not.
The real reason licensed riders are less likely to crash is because of their attitude, not their license status. Riders who take motorcycling seriously, ride legally, ride sober, and try to continuously improve their riding skills are more likely to have long and happy riding careers. It's all about attitude.
Step three: Choose the right bike for you.
Everyone has that dream bike. The one they picture in their mind’s eye riding down the road.
However, your dream bike may not be the best choice for your first bike. Why, you ask? I can think of a couple reasons:
- You may drop it. Everyone does when they are first learning. Wouldn’t you rather drop a bike that you are less emotionally and financially attached to?
- What you think you want now may not be what you want later. You’ll get a better idea of what you really want only after you’ve ridden a while and gotten some experience. No reason to fork out a ton of money only to find out a year later it doesn’t really suit your needs.
One more note: don’t go too big right away (especially women). A big motorcycle can intimidate a new rider and make you uncomfortable, and soon you’ll find yourself less enthusiastic about riding. And we don’t want that!
Get the smaller bike, and just know that at some point, you’ll want to ‘step up’ to a bigger machine. Trust me - you’ll know when the time is right.
Step Four: The gear.
It’s not just about the motorcycle; you need the right gear.
A helmet and gloves are a good start (and in my opinion, absolutely required). I have personally found a good set of boots to be crucial - you don’t want to find your feet slipping when you’re trying to stop or move the bike. Also, think about getting a jacket and pants specifically made for riding.
Gearing up right doesn't have to be expensive. You should always buy a helmet NEW, because crash damage to the interior can be undetectable to anyone but an expert. But it’s easy to find gently used riding pants, boots, gloves and jackets. Many retailers and online mail-order houses offer discounts on sell-outs and non-current styles.
Step five: Find like minded people to ride with.
 Motorcycling is a social activity. There are tons of groups out there. You can always find people on Internet Message Boards. Just do a search by the brand or type of motorcycle that interests you and see what you find.
Meeting other riders will introduce you to a level of camaraderie that's uncommon these days. Riding with responsible, experienced riders can help you improve your own skills - and it’s the icing on the cake!
- Tracey Cramer

Choosing a Phone Mount That’s Right for You
In a past article I listed seven things you might want to consider about how you use your phone while riding. My intention is to help you utilize your phone in the safest way possible.
In that article, I said you want to:
- mount your phone securely (you don't want to be worrying about it falling off!)
- in a location (handlebar, brake/clutch, mirror, windshield, etc) that
- doesn't interfere with driving - and where you can easily glance at it
In this article I’m going to focus on (1), or what we often refer to as the “gripper” portion of a motorcycle phone mount.
 Just like you may use a holster or case to protect and carry your phone on your body, you need something that "holds" (or "grips") the phone that can be attached to the motorcycle.
This is important, since it can be a "weak point" and cause your phone to fall from your bike. (We've road tested many a product, and most are not made with motorcycle vibration and the condition of today's road surfaces in mind.)
Although many motorcycle phone mounts are labelled "universal," the sheer volume of phones and phone sizes (not to mention cases and covers for them) means that what works for one will not necessarily work for another. Personal style or preference also plays a part. That's why we make mounts with different "grippers," each of which excels at different things:
- Some are better for today’s larger phones, and/or if you want to mount the phone horizontally (example: SLIDE mounts)
- Some are better if you need to plug your phone into power while you ride (example: X-Grip Adaptor mounts)
- Some are specific to the iPhones
If a picture is worth a thousand words, a video is worth 10,000!
To help you decide which works best for your phone and case, check out this video, which shows you the pros and cons of different "grippers" and what type/model phone each is most ideal for. All in under three minutes!
- Tracey Cramer

How to Know if the Swivel-CAM will work for YOU
Will the Swivel-CAM work with YOUR Camera?


 All our Swivel-CAMs are made to accommodate the industry-standard ¼-20 tripod stud, which means it will work with the majority of cameras on the market. Note that some of today’s “sport action cameras” require a “tripod adaptor” or “tripod mount adaptor” (see photos for examples of different ones) in order to accomplish this. Often this adaptor is included in the box when you purchase a camera; if not you can find them online.
Will the Swivel-CAM work on YOUR Motorcycle?
The Swivel-CAM can be mounted on a handlebar, engine guard bar, brake/clutch, mirror, and more, so it will work on a very wide variety of types of motorcycles. They don’t require much space; the URBAN Swivel-CAM, in particular, features slim brackets that fit in tight spaces.
Can You Get the Angle You Want/Need?
 The multiple pivot points on the Swivel-CAM (which we call Ultra-Swivels) as well as 360-degree rotational ability at the tip and middle (other than the "shortie") means that there are very few angles you can’t get with the Swivel-CAM.
Second, the Swivel-CAM is available in three different heights, so no matter what you’re riding or where you mount the camera, you can shoot over or around windshields or other parts of the motorcycle.
Note: We generally advise customers to choose the absolute minimum height camera mount that will work for their application. Why? Because, while our mounts incorporate anti-vibration features, there’s a law of physics (“the longer the rod, the more vibration at the tip”) that we simply can’t change.
What Does Video Shot with the Swivel-CAM look like?
We’ve done everything we can to minimize vibration, such as the anti-vibration ‘cushion’ found on each and every Swivel-CAM. Stainless steel and aluminum components also help minimize vibration and won’t rust or wear out (rubber or plastic is much more susceptible to vibration and wear).
But a video is worth 10,000 words, so here’s one we shot with the Swivel-CAM:
- Tracey Cramer