News
The Dreaded Updrafts: What to do About Them
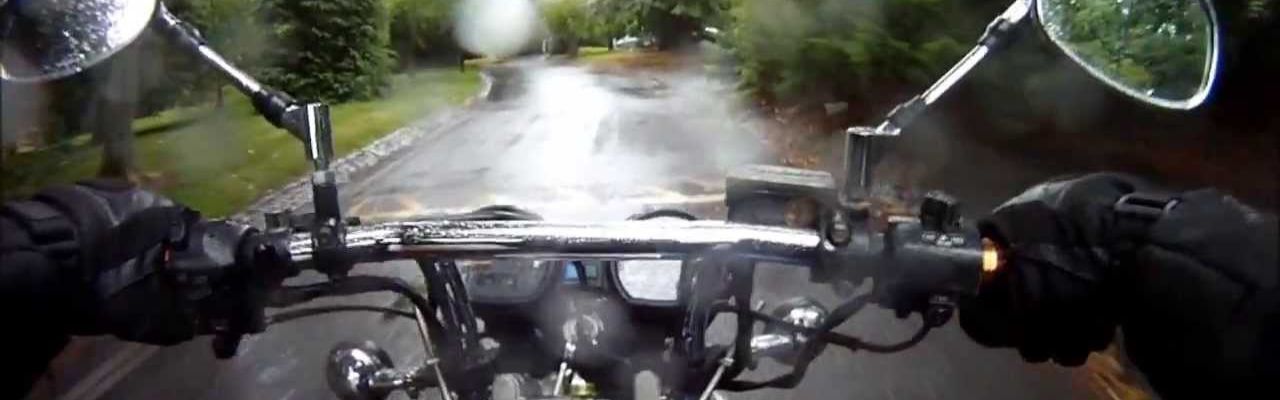
One complaint we hear a lot is that updrafts come up under the windshield and blast the rider in the face. (In Minnesota we're usually concerned about COLD updrafts LOL.) If you can minimize updrafts, you’ll have more enjoyable riding not just later into the season (and earlier in the spring), but all season long.
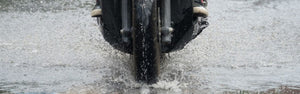
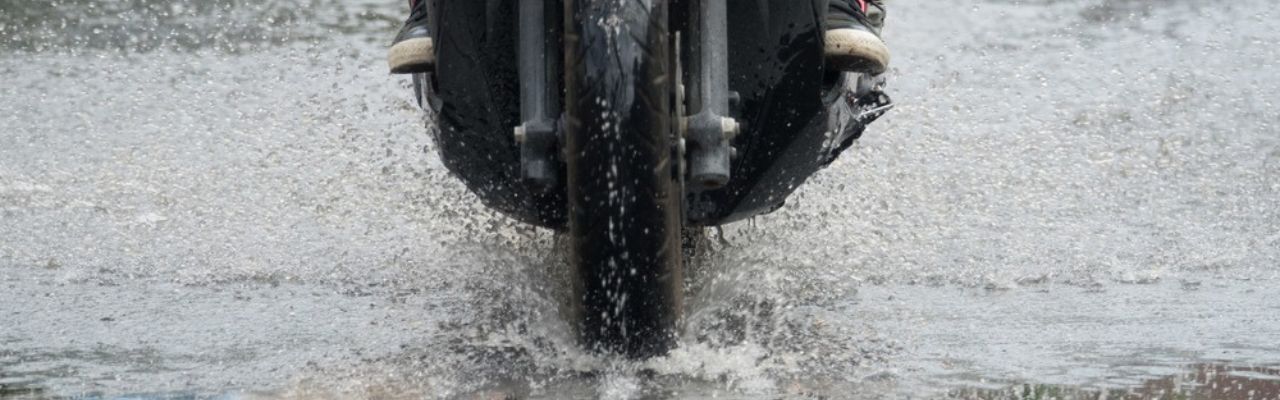
The Desert Dawgs Rain Guards/Wind Deflectors do a fantastic job of repelling water away from your legs and feet if you happen to get caught in a rainstorm. But did you know they also reduce updrafts and helmet buffeting? Instead of air hitting your legs and being redirected up toward your face, the Desert Dawgs force the air out and around (rather than up).
The effectiveness of the Desert Dawgs (or any lower deflector for that matter) varies depending on the motorcycle itself as well as on the windshield. For instance, I’ve noticed certain OEM windshields (such as some of the Yamaha ones) result in more wind in my face than the Memphis Shades windshields I’ve had on two different motorcycles.
Factors that can affect wind flow (updrafts):
- curvature of the windshield
- angle of the windshield
- space between the windshield and the engine guard bar
- rider foot placement and height

They are quite possibly the easiest and least costly way to protect your body. And because they are a cinch to remove and store in a saddlebag, you don’t need to keep them on in warmer weather (although they have no temperature restriction and can be used in warmer temps).
Read more about the Desert Dawgs - and check out Tracey's video about "the little things" - right here!
- Tracey Cramer
Riding in the Rain: Traction & Tactics
In the article It’s All About the Gear, I talked about a number of ideas for finding the right gear and clothing to keep you safer and more comfortable.
In this article I’m going to talk about skills and tactics that can help you be safer and more confident when riding in the rain.
Tires!
 Possibly one of the most overlooked improvements in the world of motorcycles relates to tires. Today’s touring tires are marvels at accommodating all the road conditions we’re continually up against. Even so, they can’t give you the same degree of traction and confidence on a wet road as they can on a dry one. And they certainly can’t help you if there’s no traction left on them! Be sure to change your tires out when they start to wear. Tires are like so many things in life: you get what you pay for. It’s just not worth skimping on tires when it could be life or limb on the line.
And, having said that, don’t forget the rest of the puzzle: keep your tires at the correct PSI! Even if it means an extra couple of minutes before you ride off into the proverbial sunset. Underinflated tires are more prone to hydroplaning on wet or rainy surfaces (NOT a good thing)!
Speed and Distance
 This seems obvious, but let’s do some simple math to help drive home my point.
If you’re traveling at 60 mph, your motorcycle will have to start coming to a stop while moving at 88 feet per second. Under perfect conditions, a skilled rider can come to a full stop in around 5.4 seconds; that includes a one-second delay before hitting your brakes.
Tip: Try keeping two fingers on your front brake lever. If you can do that, you’ll save about a second - aka about 88 feet of stopping space!
Now, looking at the numbers, you can see why it’s also a good idea to increase your following distance when riding in the rain. This gives you more time to react to any unfortunate incidences that may unfold ahead of you.
Another advantage of a slower speed is that it reduces your angle in turns (which is where problems are often encountered). Which leads nicely to my next point…
Keep it Upright
I know sometimes we want to hunch up when we’re getting pummeled with rain. But the more upright you are on the motorcycle, the more weight is applied perpendicular to the road, which increases your traction.
Avoid last-second turns and unnecessary swerves, and when braking, never apply only the front brakes because it can cause your front wheel to slip. (If your rear wheel slips, you can control/recover, but if your front starts skidding, you’re in trouble.)
Tip: Don’t “grab” the brake lever suddenly, but instead, ease the front brakes on to set up the suspension before hard braking. And use the rear brake in combination with the front (something I’m constantly having to work on) at a 60 rear / 40 front ratio if possible. Using the rear brake helps stabilize the chassis, which is a VGT (Very Good Thing).
Read the Road
 The worst rains of the season are the first ones. Oily scum has yet to wash off (and, here in Minnesota, the road salt), making the surface particularly treacherous. Rain also has the bad habit of spreading gravel and dirt around; so be on the lookout for this, particularly in rural areas (a BIG issue where we live!).
I think it’s safe to say that most of us would rather NOT hydroplane on a motorcycle (which occurs when a layer of water gets sandwiched between your tire and the road, resulting in zero traction) so avoid standing water or puddles whenever possible.
Slippery surfaces that you might not even notice in a car can be problematic for a motorcyclist. The unstable nature of a two-wheeled bike and the smaller, lighter size mean that sliding on the road can easily result in a crash. Slick surfaces are even more dangerous when the biker is turning. The list of potentially slippery objects/surfaces is long but includes:
- Leaves
- Crosswalk Lines
- Tracks
- Any painted surfaces
- Anti-freeze or oil
And, last but not least: reduce your speed. (Are we noticing a theme here? Slower is better in the rain!)
- Tracey Cramer
Riding in the Rain: How to Protect Yourself (and Enjoy the Ride)
(also see Riding in the Rain: Traction & Tactics)
While most riders don’t purposely choose to ride in the rain, you can’t be sure that a trip that starts with sunny skies will end that way. Heck, in Minnesota the weather can change by the moment!

But let’s be honest: rain makes riding a motorcycle more complex and more dangerous. But there are things you can do to increase your safety and make riding in the rain an enjoyable, rewarding experience.
In this article, I’ll address Comfort.
The truth is, anything that distracts you when you’re riding is potentially dangerous. In rainy weather that could be as 'minor' as a trickle of cold water that leaks down your neck, chilling your whole body.
So it’s important to take some time (and spend some money) to get proper waterproof clothing and gear.
Head
In rainy weather, there’s no way to get around the most common-sense item: a full-face helmet. You can keep your half-helmet or 'beanie' helmet for sunnier times, but make the investment in a full-face helmet if you expect to ride in the rain. Our advice: get one with good venting.
For those who argue that their full-face helmet fogs up in the rain or cold, we have a solution for that (and it's less than $20): get yourself an Anti-Fog insert. Problem solved.
Hands
Today’s riding gloves are amazing, and we recommend you have at least two pair with you while riding, a lighter weight pair and a ‘workhorse’ rainproof pair. Still, there are drawbacks to gloves. The biggest one (in my opinion) is that gloves add bulk, which can make it more difficult to grip and definitely more difficult to shift gears.

So, recently I’ve been experimenting with Hand Guards. These are basically a "fairing" for each hand that allows you to adjust the area of protection for each hand.
One of the better ones we've found is the WingShields by Brukus, which are made of a tough polycarbonate which makes them extremely difficult to break, yet light (and clear, which we like). You clamp them to the handlebar or mirror stem and align the curved shield ahead of your hands.
Not only will they protect you from rain, but airflow over your hands will be reduced, making your gripping area warmer.
Body (Core)
Get yourself a quality rainsuit, preferably one that incorporates a breathable membrane such as Gore-Tex or similar material. Don’t ‘cheap out’ on this!
Keep your rainsuit with you (I’ve been guilty of violating this one because I like the “naked” bike look); and pack it on top, not at the bottom, of your saddlebag. Or better yet, put it on before you ride.

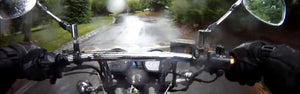
Use a windshield. Nothing else is more effective at protecting your body, and yet there is much confusion about correct windshield height. Your windshield should be low enough to look over, not just through. Read more about windshield height here.
Legs & Feet
I’ve found it takes some experimentation to find the right pair of waterproof boots, but they really make a difference if you get caught in the rain.
I hate to say it, but I wear a men’s boot. It’s changing, but for a very long time the only options for women’s boots didn’t have nearly the traction and waterproof qualities of mens (fashion is nice but safety is way better!).

Another great idea is the Desert Dawgs Rain Guards/Wind Deflectors. These soft lowers slip onto your engine guard bar like a glove on a hand and will keep rain off your legs and feet.
Most riders say they experience significant rain protection from the Desert Dawgs; many of our customers swear by 'em (some going so far as to claim they saved their life during a downpour or even snow). Read more and watch the video here.
BONUS TIPS
- Make sure your rain gear fits properly and is in good shape.
- Choose bright colors for increased visibility.
- Transfer wallet, keys, and other essentials to waterproof outside pockets.
- Watch windshield wipers of oncoming cars to see if it’s raining ahead.
- Put on all your waterproof gear and have someone turn the hose on you to check for leaks!
- Tracey Cramer

Six Ways the Swivel-CAM is Better Than a HelmetCAM
 OK, I admit it: there are times when a HelmetCAM can be an appropriate choice for shooting video while riding a motorcycle (we've done it exactly twice with a GoPro!).
That said, we’re not fans of the helmet-mounted camera for most motorcycle uses, and here’s why.
- You can't change the angle of the shot. Wherever you’re looking, that's what you're getting. If you look down at your gauges, so does your video. If you look behind you to check traffic, guess where the HelmetCam goes?
- You can’t easily adjust the camera. I once lost an entire sequence because I thought it was powered on when it wasn’t (I couldn’t see it up on my head!)
- Depending on the camera design, you may not have the best zoom function; you might find your target turned into a speck on the horizon.
Apparently we’re not the only ones who feel this way:
“Mounting a video camera on a motorcycle helmet is difficult. Modern helmets have all sorts of wacky curves, put there for either styling or aerodynamic purposes. The larger the camera the more difficult it is to mount on a helmet.” ~ WebBikeWorld Review
Our Solution? The Swivel-CAM Motorcycle Camera Mount
 The Swivel-CAM motorcycle camera mount solves some key problems that Helmet Cameras don't:
- Flexible mounting options. The Swivel-CAM is not limited to one location (helmet); it can be mounted on a handlebar, brake/clutch assembly, mirror stem and more (hint: buy extra base brackets separately to save costs and shoot from several different angles/places).
- Get almost any angle you want/need. The Swivel-CAM features multiple joints (which we call Ultra-Swivels) as well as 360-degree rotational ability at the tip. This is our ‘third generation’ design, arrived at after our own trial and error with other mounts; there are very few angles you can’t get with the Swivel-CAM!
- Different height options. The Swivel-CAM is available in a 'shortie' version as well as the 'standard' 6-inch height, so no matter what you’re riding or where you mount the camera, you can shoot over or around windshields or other parts of the motorcycle.
- Classy look. Let’s face it; a lot of motorcycle camera mounts are ugly. The Swivel-CAM’s slim rod and base look like they belong on the motorcycle.
- Anti-Vibration & Heavy-Duty Construction. We’ve done everything we can to minimize vibration, such as the anti-vibration ‘cushion’ found on each and every Swivel-CAM. Stainless steel and aluminum components also help minimize vibration and won’t rust or wear out (rubber or plastic is much more susceptible to vibration and wear).
- Works with almost any camera. The Swivel-CAM works with any camera that is tripod compatible (that is, has the industry-standard ¼-20 stud hole on it, or has a “tripod adaptor” in your kit). If you have more than one camera, or you change cameras, you won’t need another mounting system.
Can't picture it? Let us SHOW you the difference!
Quick Links: Universal Swivel-CAM Mounts | GoPro Swivel-CAM Mounts
- Tracey Cramer
How to Tell a Story with Your Motorcycle Video
Have you ever thought about sharing your motorcycle “adventure vacation” video with others? Not sure how to make it interesting? (After all, after a minute or two, an unchanging view from the saddle becomes… well… boring.)
The answer? A little creativity while you ride, plus a little editing time at the computer later.
Here are some tips to make your video into a Story that others will want to watch.
SHOOTING TIPS
- More than scenery. Capture the unplanned, such as a flat tire, a navigational oops, or your friend spilling his drink all over his bike at a rest stop (yep - seen it!).
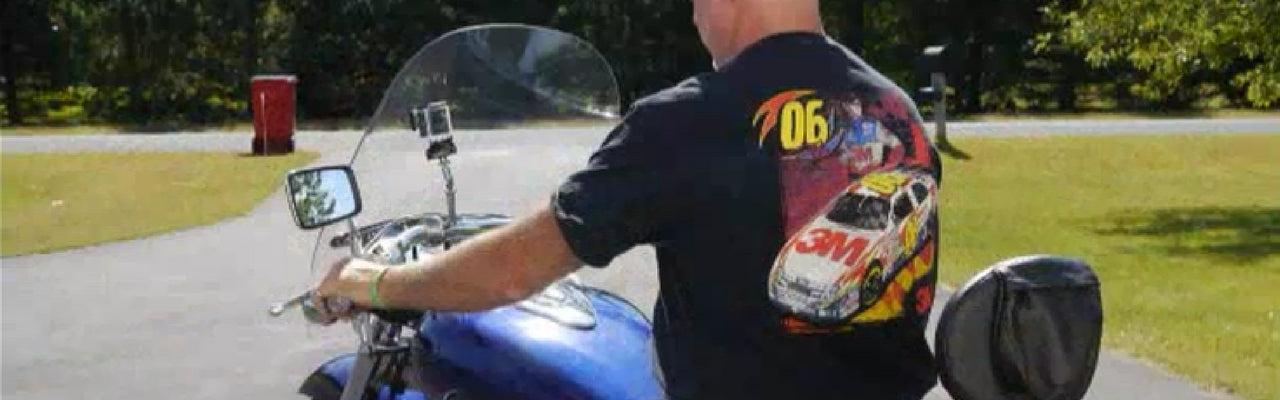
- Multiple cameras and/or angles. Use the Swivel-CAM to place one camera up front, one to the side, and maybe a helmet camera (horrors!). Ride ahead and get off the bike to shoot the others coming toward you.
- Utilize a passenger. There's no limit to what you can shoot if you don't have to throttle, grip, brake, etc. (I'm not often the passenger on a motorcycle, but on this particular day we wanted to shoot some footage over hubby's shoulder.)
- Interview. Video others in your group talking about their experience or sharing their thoughts about your travels.
- Software. Use something simple and straightforward; after all, you’re not making a documentary for the Travel Channel.
- Shorter is better. Experts say today’s internet viewers have a max attention span of two minutes.
- Change it up often. No one scene should be more than 10 seconds long.
- Narration. You don’t have to be a professional voice-over artist. Just tell the viewer what you’re thinking and feeling.
- Use still images. Mix your video with photos you took on the trip (or find royalty-free images online).
- Add a little music. Google “royalty free music” to avoid any rights infringement. There’s plenty out there.
- Tracey Cramer
Motorcycle Travel, Part III: Comfort & Convenience
Here at Leader we’re all about comfort and convenience! We covered planning tips (see articles "Dreaming" and "Planning") in other posts. Now it’s time to start thinking about the ‘little things’ that will make your trip so much more enjoyable.
Packing
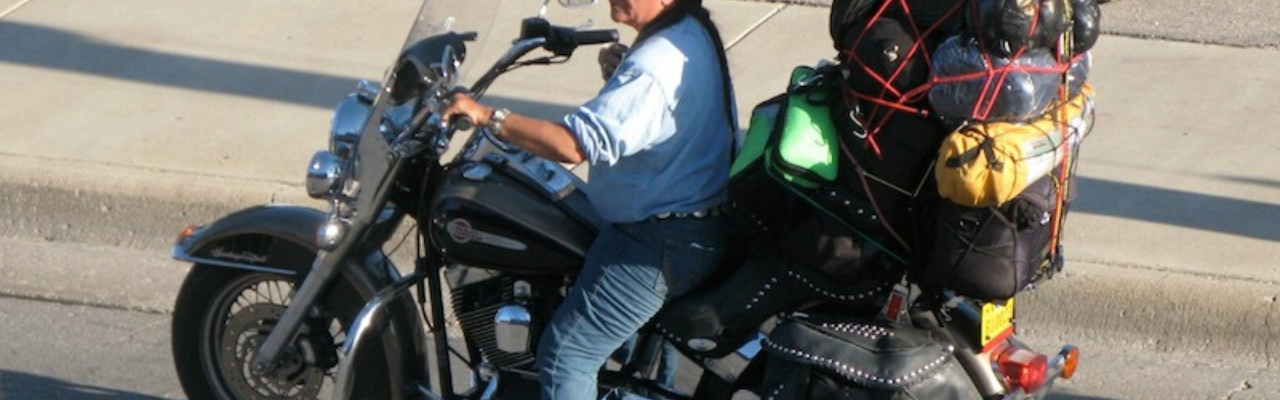
 Packing is super important on a bike because you have such limited space. You don't want to look like this guy!
Think about the weather where you are traveling and realize the temperature may swing from high to low in the span of a day.
Layer clothing whenever possible, and make sure you have the essentials: jeans, underwear, extra socks, long-sleeve shirt and your favorite T-shirts. Another must: rain gear and good-quality leather chaps.
Helmet Laws
Know the helmet laws in the states in which you’re traveling. Don’t get caught without one in a helmet-law state! (No fun to get a ticket on your dream trip.) Check out this site for a map of the states where helmets are required.
Don’t try to do too much
If you’re not used to riding long distances, don’t force yourself to stay in the saddle for hundreds of miles. Plan stops along the way: for hydration, a bathroom break, or just to walk around and get the blood flowing (and give your rear a break). Plan the total number of hours or miles to be comfortable for you and you’ll have a much more enjoyable trip.
 Invest in a set of Desert Dawgs for rain and wind protection; a butt cushion (or custom seat if your budget allows); or some music… anything for comfort and convenience.
NOW you’re ready to go! Or are you? We’ve got a few MORE tips for you in this article (Part IV in our travel series), such as recording memories, taking precautions and preparing your bike.
- Tracey Cramer