News
Motorcycle Travel, Part II: Planning
Have you picked a destination you want to ride your motorcycle to? Great! Now have some fun planning it!
See cool stuff
The roads are not the only reason for the trip. Make sure to plan fun and interesting destinations along your route. That could mean a beach, a mountain range, a forest, a city, a monument, a desert, an amusement park, an ocean (or, heck, some relatives or friends!). The list is endless.
Don’t get lost
 You’ll enjoy your trip more if you’re not stressed about finding a place to sleep, or wondering how far you can go on a tank of gas.
Get a GPS or a navigation app on your smart phone (See our blog post about GPS vs. Phone) and plug in your route. That way you can simply follow along and not have to worry about getting lost.
Some minor adjustments to your GPS can make you more comfortable (such as turning the screen brightness all the way up). And, of course, you want to make sure your phone or GPS is securely mounted.
Eating...
 Look for out-of-the-way “local” places to eat (they often have the best food and atmosphere).
How about taking a tour of America’s weirdest food? Ever tried Scrapple in Pennsylvania? The name is as it implies. Scrapes of the pig! (Could it be good??)
Wisconsin - up in our neck of the words! - is famous for fried cheese curds. (These are amazing!)
Geoduck anyone? The leathery siphon protruding from the six-inch shell of this odd-looking deep-water clam can reach up to three feet in length. Served like sashimi and sauteed in butter. (Not sure about this one...)
And sleeping!
Try to plan your day’s travel so you end up at a location where lodging is available. In peak times of the year lodging can be hard to come by so you may want to make reservations in advance. Knowing where you are going and where you will stop helps make the trip less stressful.
Think about where you want to stay. Do you prefer a big hotel or something smaller? I love a good B&B; they’re often quaint or quirky, and the food is usually fantastic. Plus they have their fingers on the pulse of what is happening locally and are a great source for things to do in the area.
Every state (and many municipalities) has dedicated tourism websites that can be helpful in identifying destinations and lodging.
- Tracey Cramer

Motorcycle Travel, Part IV: Memories and Maintenance
Okay, you’ve picked your destination, planned your route, and found some fun places to visit along the way. You know which states to wear a helmet in and your bags are packed. What are you forgetting?
Saving memories
Many wonderful memories are going to be made during this trip. Have you thought about how you’re going to save them? Your own brain, you say? Well, if you're like me things don’t stick in the old noggin like they used to. What’s the solution?
Make a video!
 Now that you’re finally taking your dream trip, there’s nothing cooler than recording it in both picture and video. The scenery and shots are amazing!
Must have for this trip is a video camera! Ideally, your camera and mount will provide:
- A clean, streamlined profile
- Unlimited angle-ability
- 360-degree rotational swivel
- Built-in anti-vibration
One last thing to think about
Have you taken your bike for a “wellness” check? The two of you are going to be spending a lot of time together on this trip.
Make sure your motorcycle is roadworthy and reliable before setting out. Ensure all equipment is working and can withstand the rigors of the road. The tires should have plenty of rubber and be properly inflated, the oil and other fluids should be clean and topped off, and all lighting should be working.
If your bike has a chain drive, the chain should be properly tensioned and lubricated, and if belt driven, the belt should be inspected for wear and properly tensioned. Make sure all nuts and fastening hardware are tight.
Precautions
Make sure someone knows where you are going and all of your contact information and insurance information is up-to-date.
Now with all of this proper planning it is time to go! You are prepared, packed, organized, and it is time to hit the road. You can do it knowing you are prepared and are going to make memories that will last a life time! Enjoy!
- Tracey Cramer
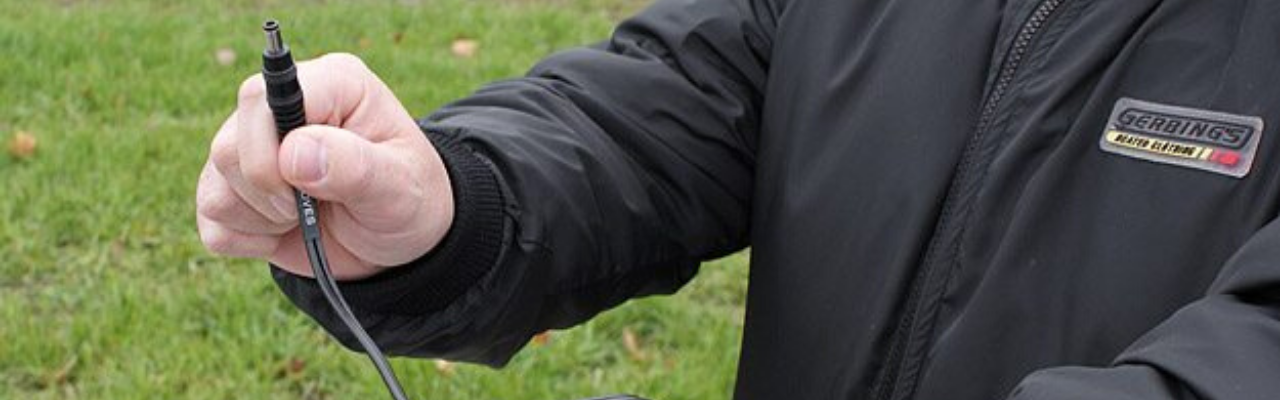
How to Keep your Hands & Fingers Warmer
They’re hangin’ out there with no protection from the windshield or fairing. Yep: your hands (and by extension, your fingers). So what’s a rider to do?
Gloves
Today’s riding gloves are way better than I remember them being twenty years ago (actually I've been riding longer than that but who's counting?). Still, there are drawbacks. The biggest one (in my opinion): Gloves add bulk, which can make it more difficult to grip and definitely more difficult to shift gears.
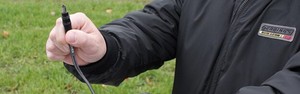
Heated Grips
 In the past I’ve had heated grips on my motorcycle. Let me tell you, that was heavenly. But it’s not a perfect solution:
- Wiring them through the handlebar was a P-A-I-N.
- They don't protect from rain.
- I can’t prove this, but I’m convinced they drain the battery faster
Hand Guards
Until recently, there were only a few products available that attempted to deal with wind chill on the hands, but they simply didn't work well. We know - we tried them and were disappointed.
 What you need is basically a "fairing" for each hand that allows you to adjust the area of protection for each hand. The ATV and dirt bike market figured this out long ago and I can’t figure out why the cruiser market hasn’t embraced this concept!
 One of the better ones we've found is the WingShields by Brukus, which are made of a tough polycarbonate that makes them extremely difficult to break, yet light (and clear, which we like). You clamp them to the handlebar or mirror stem and align the curved shield ahead of your hands.
With a few extras like these on our bikes, we've been able to extend our riding season - and start earlier in the spring!
- Tracey Cramer

New Year's Resolution: Learn to Ride! How to do it Right!
Have you been thinking about getting a motorcycle and/or learning to ride? Does the idea of riding free on two wheels make you smile? Have you seen bikers go by and wondered what you were missing? Or maybe you just want to save a little gas on your commute?
Whatever your reasons for wanting to ride, we want to help you with a few pointers. If you are a new rider there are some important things you should know before getting in that seat.
Step One: Take a class.
Maybe you’re thinking, ‘my husband/brother/boyfriend rides a motorcycle, he can teach me.’ Well, maybe he can, but it may not be a good idea. It’s better to find a teacher who’s not too intimately involved with you. He/she will be more impartial and less nervous about what you are doing.
I can’t say enough about the Motorcycle Safety Foundation Riding Course. I took it years ago, and when I married I insisted my husband take it, too (because *I* didn’t want to teach him!).
An added bonus to the course is that in most states, you can take the license exam at the conclusion of the course. In addition, in some states passing the MSF course qualifies you for discounts on insurance. AND the MSF course can be completed in one weekend.
You may be able to find other riding classes offered for free, but even if there’s a cost, it’s money well spent. Try google to search out classes offered in your area.
I believe so strongly in getting some basic training that you notice I listed this as Step ONE, and then...
Step Two: Get licensed.
Does a motorcycle endorsement on the piece of plastic in your wallet make your riding skills sharper? Of course not.
The real reason licensed riders are less likely to crash is because of their attitude, not their license status. Riders who take motorcycling seriously, ride legally, ride sober, and try to continuously improve their riding skills are more likely to have long and happy riding careers. It's all about attitude.
Step three: Choose the right bike for you.
Everyone has that dream bike. The one they picture in their mind’s eye riding down the road.
However, your dream bike may not be the best choice for your first bike. Why, you ask? I can think of a couple reasons:
- You may drop it. Everyone does when they are first learning. Wouldn’t you rather drop a bike that you are less emotionally and financially attached to?
- What you think you want now may not be what you want later. You’ll get a better idea of what you really want only after you’ve ridden a while and gotten some experience. No reason to fork out a ton of money only to find out a year later it doesn’t really suit your needs.
One more note: don’t go too big right away (especially women). A big motorcycle can intimidate a new rider and make you uncomfortable, and soon you’ll find yourself less enthusiastic about riding. And we don’t want that!
Get the smaller bike, and just know that at some point, you’ll want to ‘step up’ to a bigger machine. Trust me - you’ll know when the time is right.
Step Four: The gear.
It’s not just about the motorcycle; you need the right gear.
A helmet and gloves are a good start (and in my opinion, absolutely required). I have personally found a good set of boots to be crucial - you don’t want to find your feet slipping when you’re trying to stop or move the bike. Also, think about getting a jacket and pants specifically made for riding.
Gearing up right doesn't have to be expensive. You should always buy a helmet NEW, because crash damage to the interior can be undetectable to anyone but an expert. But it’s easy to find gently used riding pants, boots, gloves and jackets. Many retailers and online mail-order houses offer discounts on sell-outs and non-current styles.
Step five: Find like minded people to ride with.
 Motorcycling is a social activity. There are tons of groups out there. You can always find people on Internet Message Boards. Just do a search by the brand or type of motorcycle that interests you and see what you find.
Meeting other riders will introduce you to a level of camaraderie that's uncommon these days. Riding with responsible, experienced riders can help you improve your own skills - and it’s the icing on the cake!
- Tracey Cramer

Motorcycle Travel Comfort & Convenience (the Cool Stuff & the Little Things)
Do you dream of life on the road, just you and two wheels (or three)? We all have places we’ve been daydreaming about. Pick one from your ‘bucket list’ and make it happen! Here are some tips to help!
Picking a Route
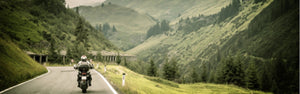
The beauty of traveling on a motorcycle is that no one just “takes the freeway.” For some the point/goal is to pick roads they’ve never ridden on. Others look for scenic drives, roads with lots of curves (hooah!) or quaint towns they can explore along the way.
Google the words “scenic routes” and all kinds of things come up. Or, get out your “old-fashioned” map and peruse your route to see what towns and sights are near it.
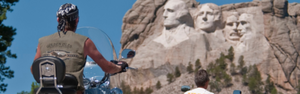
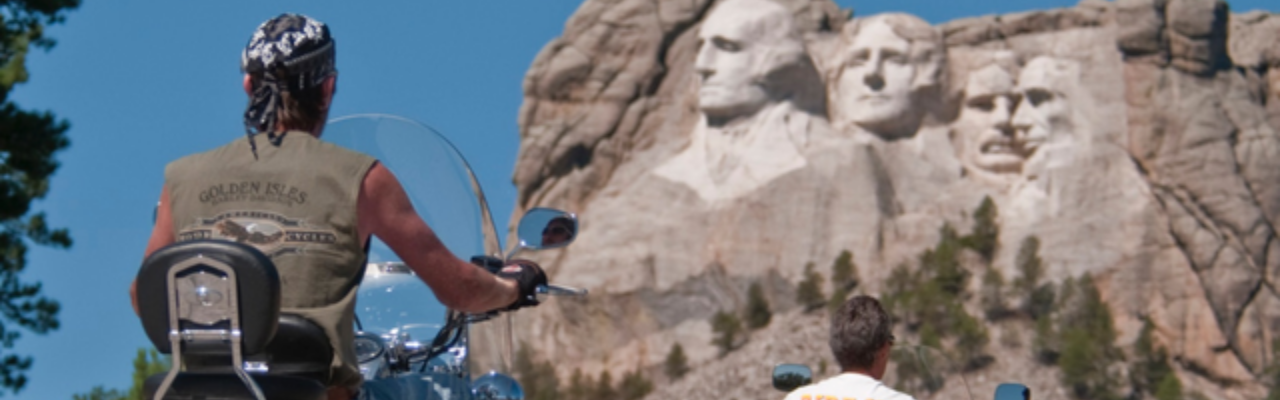
If you’ve always wanted to see a landmark (say, Mount Rushmore or Niagara Falls) or tourist attraction (Disneyland?!), plan your route to take you through it (or by it).
Experience Cool Stuff
The roads are not the only reason for the trip. Make sure to plan fun and interesting destinations along your route.
Look for out-of-the-way “local” places to eat (they often have the best food and atmosphere).
Think about where you want to stay. Do you prefer a big hotel chain or something smaller? I love a good B&B (see http://www.bnbfinder.com/ or https://www.bedandbreakfast.com/); they’re often quaint or quirky, and the food is usually fantastic. Plus they have their fingers on the pulse of what is happening locally and are a great source for things to do in the area.
Every state (and many municipalities) has dedicated tourism websites that can be helpful in identifying destinations and lodging.
Try to plan your day’s travel so you end up at a location where lodging is available. (In peak times of the year you may want to make reservations in advance.)
TIP: Don’t get lost
You’ll enjoy your trip more if you’re not stressed about finding a place to sleep, or wondering how far you can go on a tank of gas. Get a GPS or a navigation app on your smart phone (See our blog post about GPS vs. Phone) and plug in your route. That way you can simply follow along and not have to worry about getting lost. Of course, you want to make sure your phone or GPS is securely mounted (hint: use a Leader mount!).
 TIP: Don’t get lost
The Little Things: Comfort & Convenience
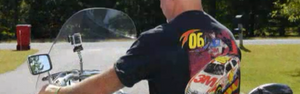
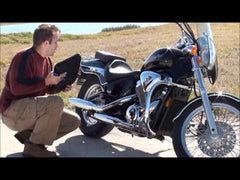
 Packing: Packing is super important on a bike because you have such limited space. You don't want to look like this guy! Think about the weather where you’re traveling and realize the temperature may swing from high to low in the span of a day. Layer clothing whenever possible, and make sure you have the essentials. Another must: rain gear and good-quality leather chaps.
Helmet Laws: Know the helmet laws in the states in which you’re traveling. Don’t get caught without one in a helmet-law state! (No fun to get a ticket on your dream trip.) Check out this site for a map of the states where helmets are required.
Don’t Try to do Too Much
 If you’re not used to riding long distances, don’t force yourself to stay in the saddle for hundreds of miles. Plan stops along the way: for hydration, a bathroom break, or just to walk around and get the blood flowing (and give your rear a break). Plan the total number of hours or miles to be comfortable for you and you’ll have a much more enjoyable trip.
Invest in a set of Desert Dawgs for rain and wind protection; a butt cushion (or custom seat if your budget allows); or some music… anything for comfort and convenience.
One last thing to think about
Have you taken your bike for a “wellness” check? You and your motorcycle are going to spend a lot of time together on this trip, so make sure your bike is “healthy”! Make sure someone knows where you’re going and all your contact information and insurance information is up-to-date and stored in a safe place.
You are prepared, packed, organized, and it’s time to hit the road. You can do it knowing you are going to make memories that will last a lifetime! Enjoy!
TIP: Saving Memories
Now that you’re finally taking your dream trip, there’s nothing cooler than recording it in both picture and video. The scenery and shots can be amazing!
Today’s action cams are light and powerful. Naturally, we have what you need to mount the camera: the Swivel-CAM is perfect for shooting video.
Think of all the fun you’ll have going back to watch this video in the dead of winter!
 TIP: Saving Memories
- Tracey Cramer
New to Riding: Choosing a Bike & Gear
In my previous post, I talked about learning to ride safe, right from the beginning. You’ll enjoy yourself so much more, too! Let’s pick up from there.
Step three: Choosing the right bike for you.
 Everyone has that dream bike. The one they picture in their mind’s eye riding down the road.
 However, your dream bike may not be the best choice for your first bike. Why, you ask? I can think of a couple reasons:
- You may drop it. Everyone does when they are first learning. Wouldn’t you rather drop a bike that you are less emotionally and financially attached to?
- What you think you want now may not be what you want later. You’ll get a better idea of what you really want only after you’ve ridden a while and gotten some experience. No reason to fork out a ton of money only to find out a year later it doesn’t really suit your needs.
Get the smaller bike, and just know that at some point, you’ll want to ‘step up’ to a bigger machine. Trust me - you’ll know when the time is right.
Step Four: The gear.
It’s not just about the motorcycle; you need the right gear.A helmet and gloves are a good start (and in my opinion, absolutely required). I have personally found a good set of boots to be crucial - you don’t want to find your feet slipping when you’re trying to stop or move the bike. Also, think about getting a jacket and pants specifically made for riding.
 Gearing up right doesn't have to be expensive. You should always buy a helmet NEW, because crash damage to the interior can be undetectable to anyone but an expert. But it’s easy to find gently used riding pants, boots, gloves and jackets. Many retailers and online mail-order houses offer discounts on sell-outs and non-current styles.
Step five: Find like minded people to ride with.
Motorcycling is a social activity. There are tons of groups out there. You can always find people on Internet Message Boards. Just do a search by the brand or type of motorcycle that interests you and see what you find.Meeting other riders will introduce you to a level of camaraderie that's uncommon these days. Riding with responsible, experienced riders can help you improve your own skills - and it’s the icing on the cake!
- Tracey Cramer